

The Robot from Lost In space
My Journey to Resurrect That Bumbling Bag of Bolts – Building A Full-Scale, Fully Functional B9 Robot from Lost in Space — by Brian Ebie
The Robot from Lost In space
My Journey to Resurrect That Bumbling Bag of Bolts – Building A Full-Scale, Fully Functional B9 Robot from Lost in Space — by Brian Ebie
Building A Friend From My Childhood
by Brian Ebie

Brian Ebie with his first Robot in 1981
Some kids had imaginary friends. I had a robot.
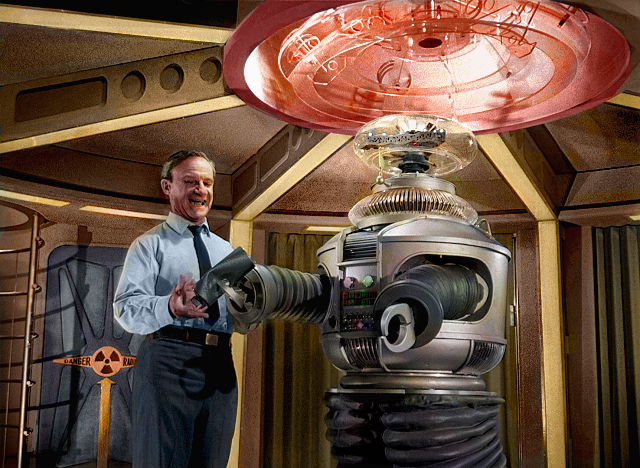
Growing up watching Lost in Space, the B9 Robot wasn’t just part of the show’s scenery. He was a guardian, a companion, a comic relief, and somehow, the most human character on the Jupiter 2. His flashing lights, whirring arms, and famous warnings captured my imagination. To me, he wasn’t just a machine — he was a friend.
I wanted a robot. That Robot.
The B9 from Lost in Space wasn’t just a character on TV — he was a dream wrapped in aluminum and flashing lights. Protective, witty, loyal, and strangely human for a machine, he captured my imagination like nothing else. So in 8th grade, I decided I wasn’t going to just admire robots — I was going to build one.
Armed with sheet metal and ductwork, dryer duct, blinking Christmas lights, a rotisserie motor, and a whole lot of ambition, I built my first robot and entered him into science fairs. He had a working plastic, articulated fingers on one hand and a functional gripper claw on the other that could turn a screwdriver — a feature I was especially proud of. One arm moved up and down, one hand had moving fingers, and on his chest were lights that blinked just like B9’s. I didn’t have CAD or 3D printers — I had a backyard shed, my dad’s sheet metal shop (he was an HVAC man), a dream, and whatever parts I could scrounge or repurpose.
That robot won ribbons, but more importantly, he taught me that I could bring imagination to life with my own hands. He may not have spoken or warned of incoming danger, but he represented something even more powerful: the moment a childhood passion turned into a lifelong love for building, creating, and bringing the impossible a little closer to real. And when you’re an only child on a country road, it’s fun to build a friend.
Now, all these years later, I’m picking up where I left off — with better tools, more experience, and the same wide-eyed excitement — to finally build the B9 Robot as he was meant to be: full-sized, fully functional, and fully alive in my pipe organ workshop.
Fast Forward 40 Years… — by Brian Ebie
Fast forward 40 years, and suddenly there’s this amazing thing called 3D printing — a technology that would’ve seemed like pure science fiction back when I was cutting metal panels in my dad’s sheet metal shop. What once took days with hand tools and scrap parts can now be drawn on a screen and printed overnight in stunning detail.
And I wasn’t alone anymore.
What started as a childhood dream has grown into something much bigger — a global community of builders, makers, and fans who, like me, were inspired by the robots of their youth. Just as there's an incredible community of people who bring Star Wars' R2-D2 to life in garages and workshops around the world, there's a devoted group keeping B9 alive — one servo, circuit, and printed part at a time.
These builders share files, give advice, compare part tolerances, and celebrate each other’s progress. Some are engineers, some are hobbyists, some are just lifelong fans — all brought together by a shared passion and a deep love for the “bubble-headed booby.”
Thanks to these generous and brilliant people, the dream that once lived in my imagination — and in that first aluminum-and-coffee-can robot — is now becoming a reality in full scale. I’ve got better tools, better parts, and most importantly, better company.
We’re not just building robots anymore. We’re building community, friendship, and for some of us — we’re finally building that one robot we always wanted.
Blinking lights on B9 Robot’s Chest Panel by Brian Ebie

3-D printing the B9 Lost In Space Robot by Brian Ebie

Screen capture from Lost In Space by Brian Ebie
Enjoy the Journey
In the following pages, I hope you enjoy this builder’s diary — the ongoing saga of my efforts to bring a fully functional B9 Robot to life… even if he sometimes behaves, as Dr. Smith would say, like a “Clod-Like Collection of Condensors.”
This project has been as much about learning as it has been about building. Along the way, I’ve taught myself how to 3D print complex parts, write code, program Arduinos, wire up LEDs, control servo motors, and troubleshoot more electronics than I care to admit. What once seemed impossibly technical has become second nature through trial, error, and sheer stubbornness.
This diary is a record of progress — from printing the first shoulder bracket to hearing the robot’s voice echo through my shop for the first time. It’s full of successes, setbacks, and small victories that make the next step feel worth taking.
If you’re a fellow builder, a fan of Lost in Space, or just someone who once dreamed of creating something larger than life, I hope this journey sparks a little inspiration — or at the very least, a smile.
After all, every Blithering Booby needs someone to build him.
Getting Started: Research, References & Inspiration — by Brian Ebie
Every great build starts with a blueprint — or at least a sketch on a notebook and a head full of childhood memories.
Before the first part was printed or wire was stripped, I dove headfirst into researching every detail I could find about the B9 Robot. From frame dimensions and lighting patterns to sound clips and servo configurations, I wanted to get it right. Thankfully, I wasn’t alone. The B9 Builders Club proved to be a goldmine of shared knowledge, design files, and generous advice from people who had been exactly where I was — staring at a pile of parts and wondering, “Where do I even begin?”
Screen captures, forum posts, 3D model libraries, and even freeze-framing episodes of Lost in Space became part of my daily routine. I studied original measurements, fan-made schematics, and modern adaptations to find the balance between screen-accuracy and real-world function.
This wasn’t just about copying a prop — it was about understanding the soul of the machine that inspired me so many years ago.
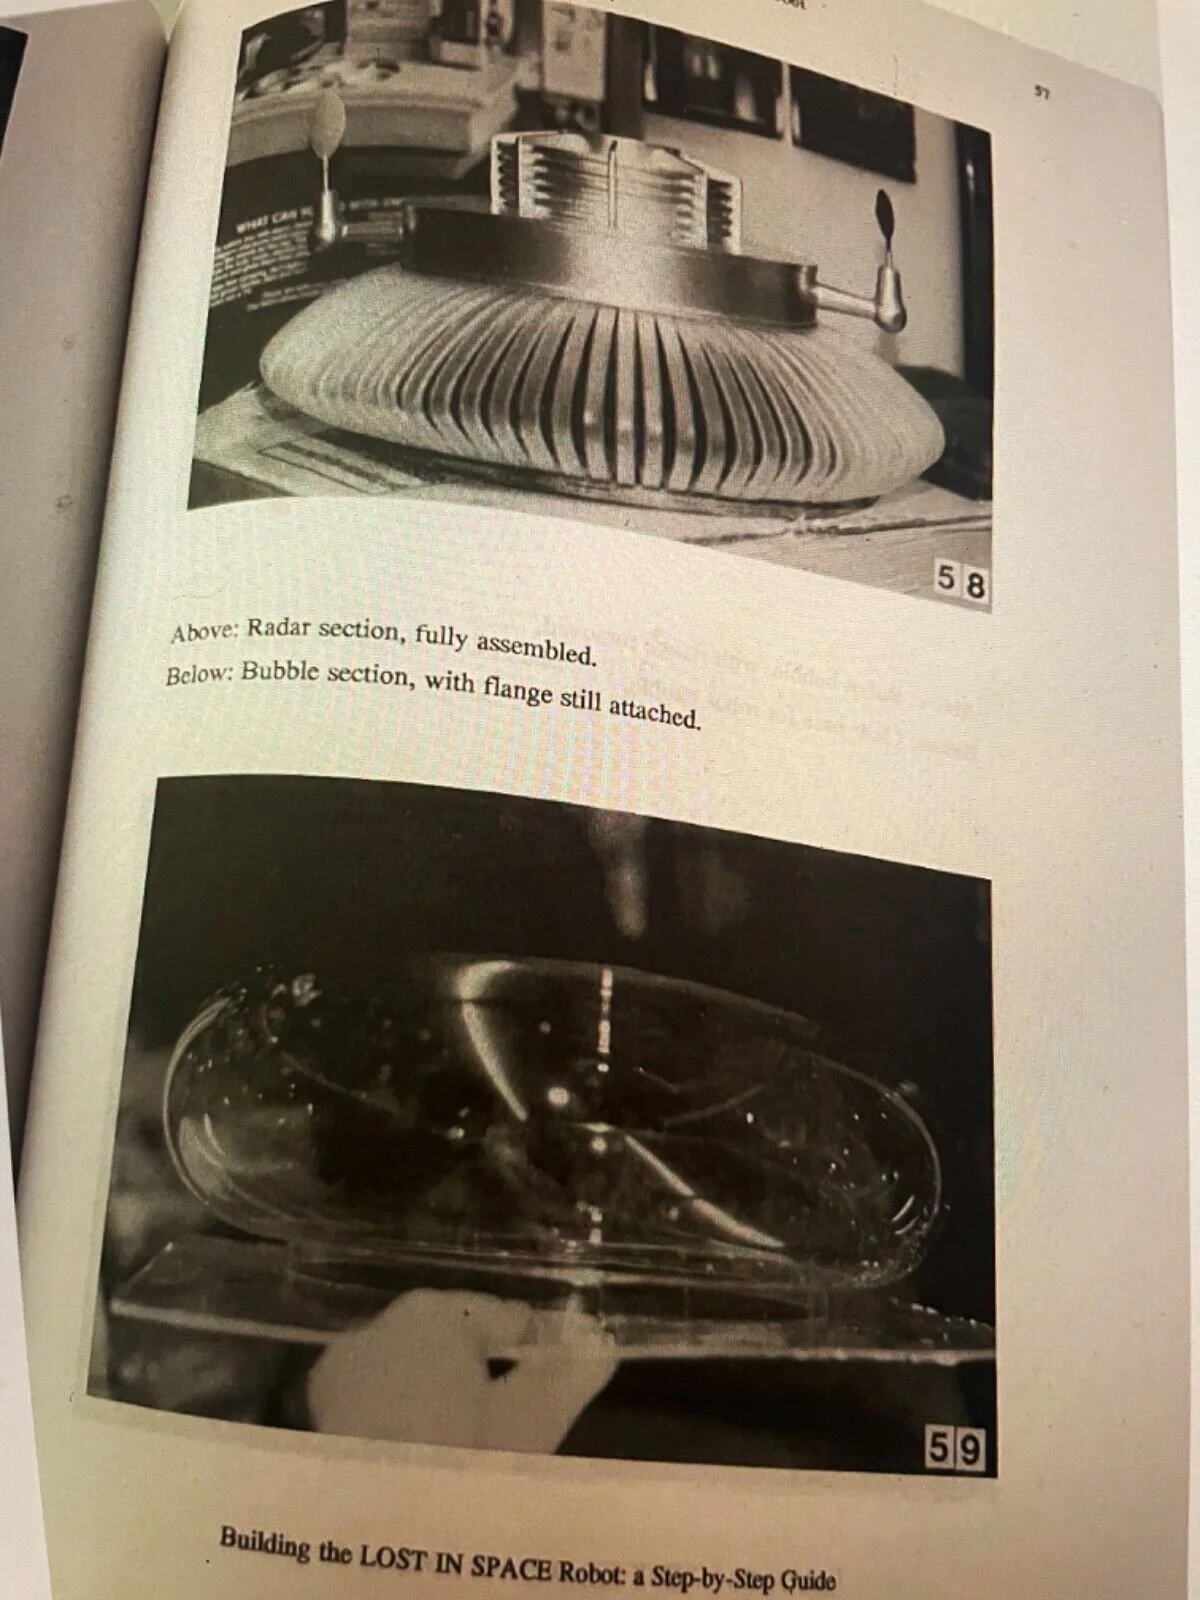
The first place I started was to pick up a copy of You Can Build… The Lost In Space Robot by Flint Mitchell on eBay. Sometimes these go for a pretty high price, but I was lucky to find one in minty condition and for just $35.00. Still relevant today, it provides a great deal of reference material and how-to, especially if you’re not afraid to take on really big projects. Take a look at the pics below.


Diving Deeper: Exploring the B9 Robot Builders Club – A Key Resource in Brian Ebie’s Build
My next destination was the B9 Robot Builders Club, an invaluable hub for enthusiasts dedicated to recreating the iconic B9 Robot from Lost in Space. This site became an essential resource, offering a wealth of information and community support.
I meticulously browsed through each section, starting with the Club Gallery, which showcased a diverse array of member builds. These images provided inspiration and practical insights into various construction techniques and finishes

screenshot of B9 Robot Builders Club Website — Brian Ebie
The Robot Reference Information section was a treasure trove, offering detailed blueprints, assembly guides, and specifications for different robot components. I found the Club Standard Online Blueprints particularly helpful, as they provided accurate dimensions and assembly instructions for parts like the torso, arms, and tread sections. These resources were instrumental in ensuring the accuracy and functionality of my build.
Additionally, the site offered links to trusted suppliers for parts and materials, which streamlined the procurement process. The community forums and discussion boards were also invaluable, allowing me to connect with fellow builders, share experiences, and seek advice when faced with challenges.
Engaging with the B9 Robot Builders Club not only enriched my understanding of the robot's design but also connected me with a passionate community that shares a common goal: bringing the beloved B9 Robot to life. They also have a private Facebook group one can join where people share pictures of builds in progress, ask questions, and share resources.
Tools of the Trade: Learning 3D Printing & CAD — by Brian Ebie

Screen Cap of Mark Thompson’s Lost in Space B9 Robot site — Brian Ebie
After committing to the build, I knew I needed a solid foundation — both literally and figuratively. I started by ordering a set of professional B9 Robot blueprints from Mark Thompson at B9Robot.com, a site that has been a great resource for B9 plans, parts, and wisdom. Mark’s attention to detail and dedication to the B9 community is unmatched, and his Legacy Blueprints gave me exactly what I needed to begin.
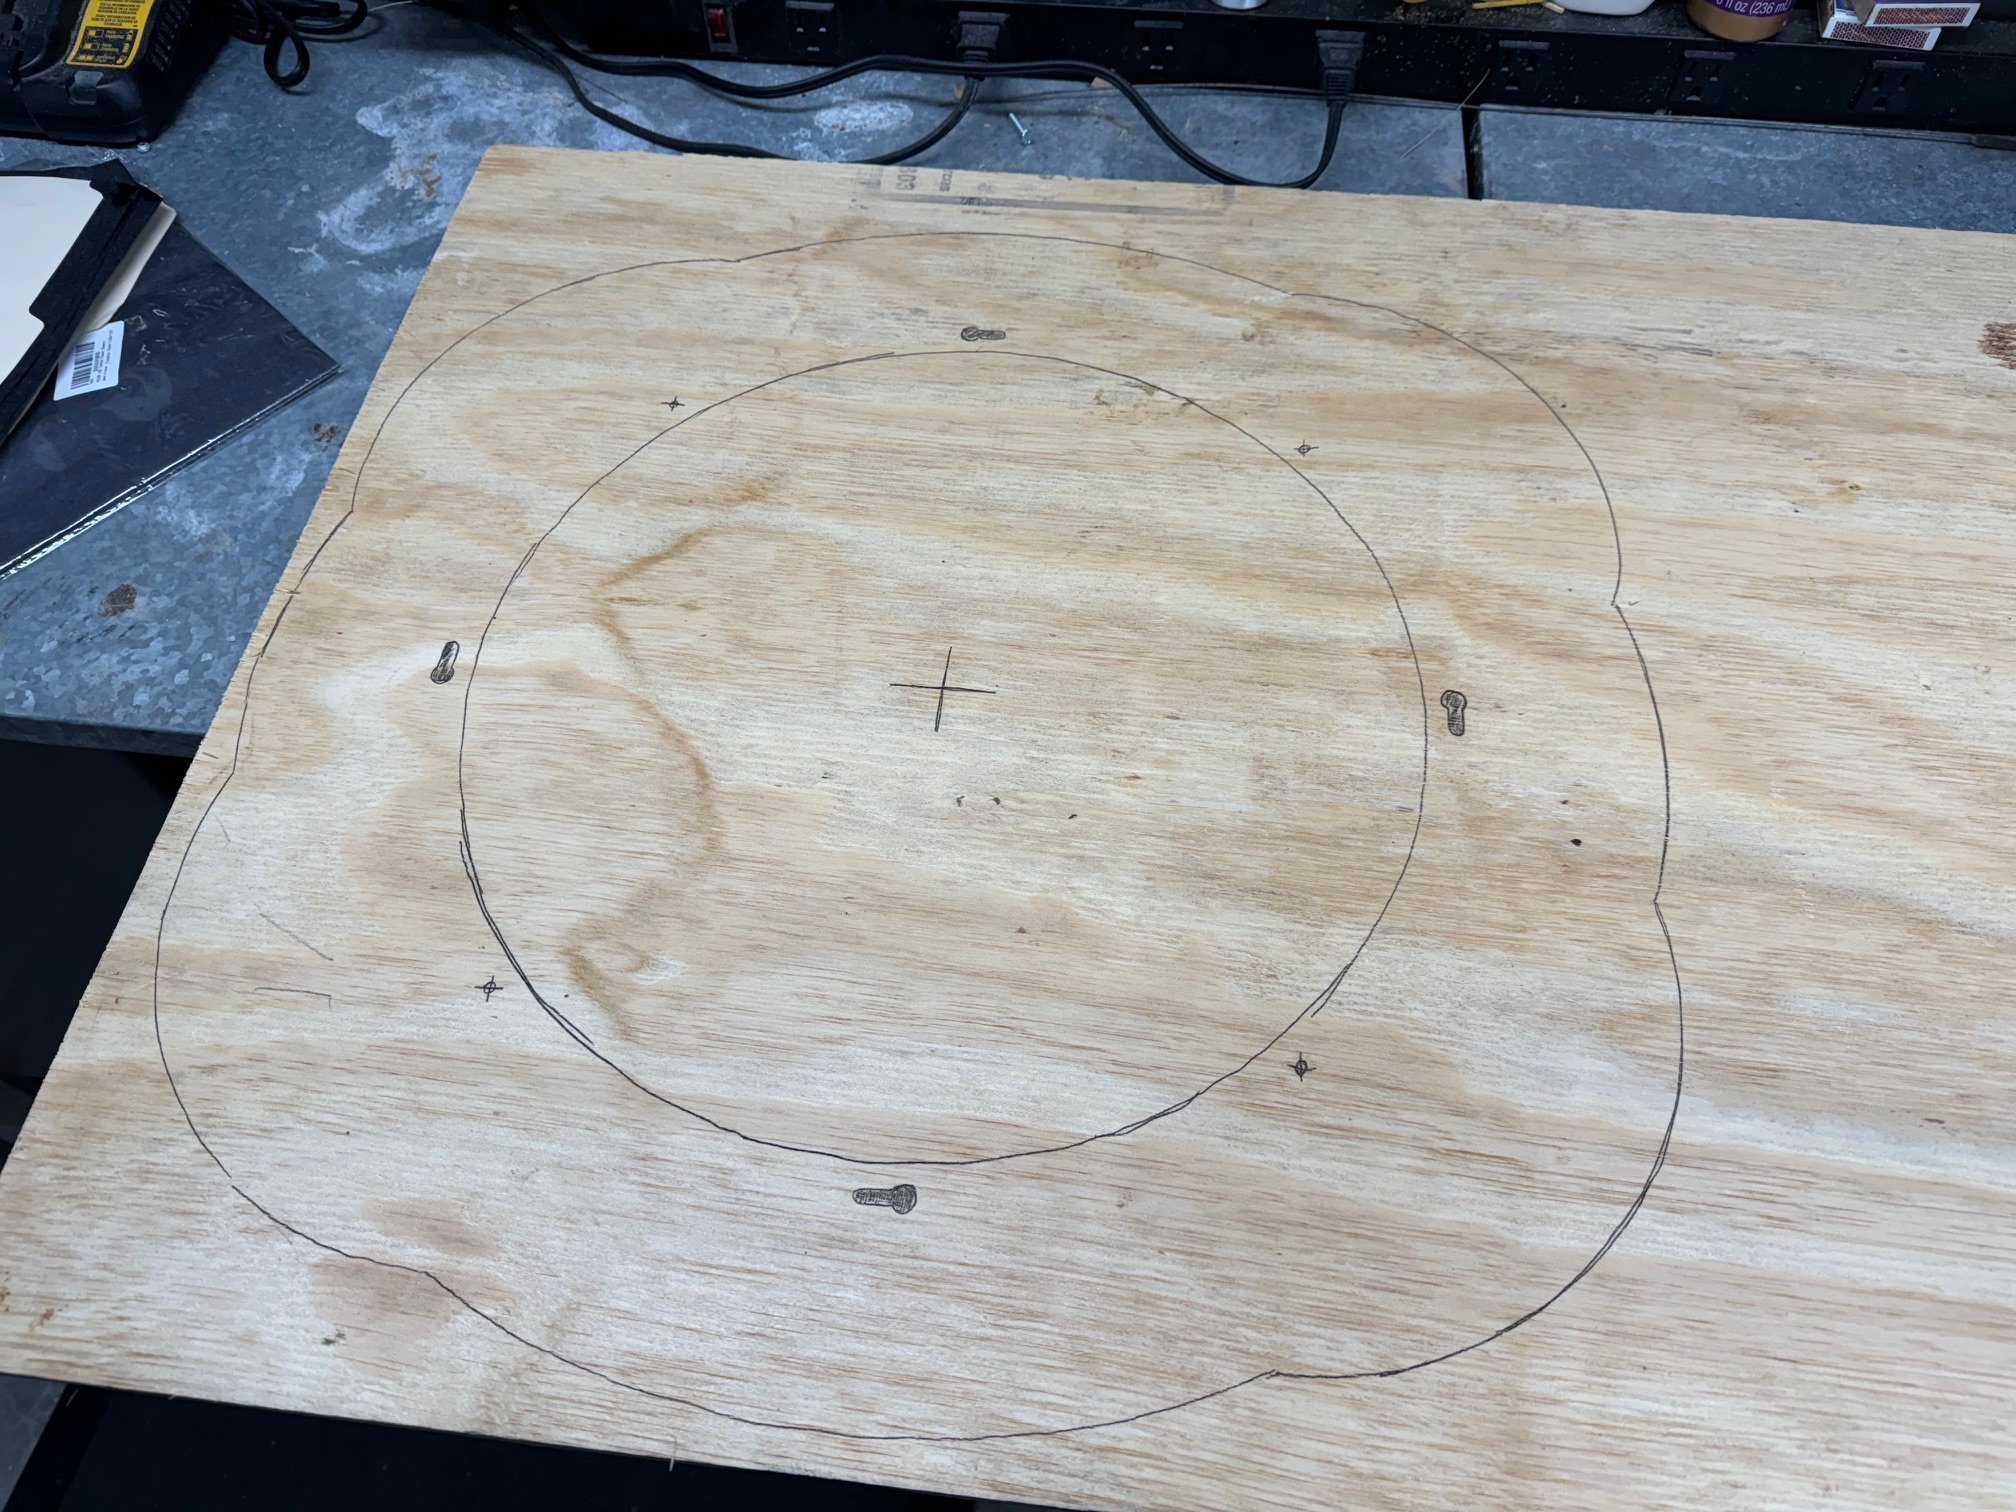
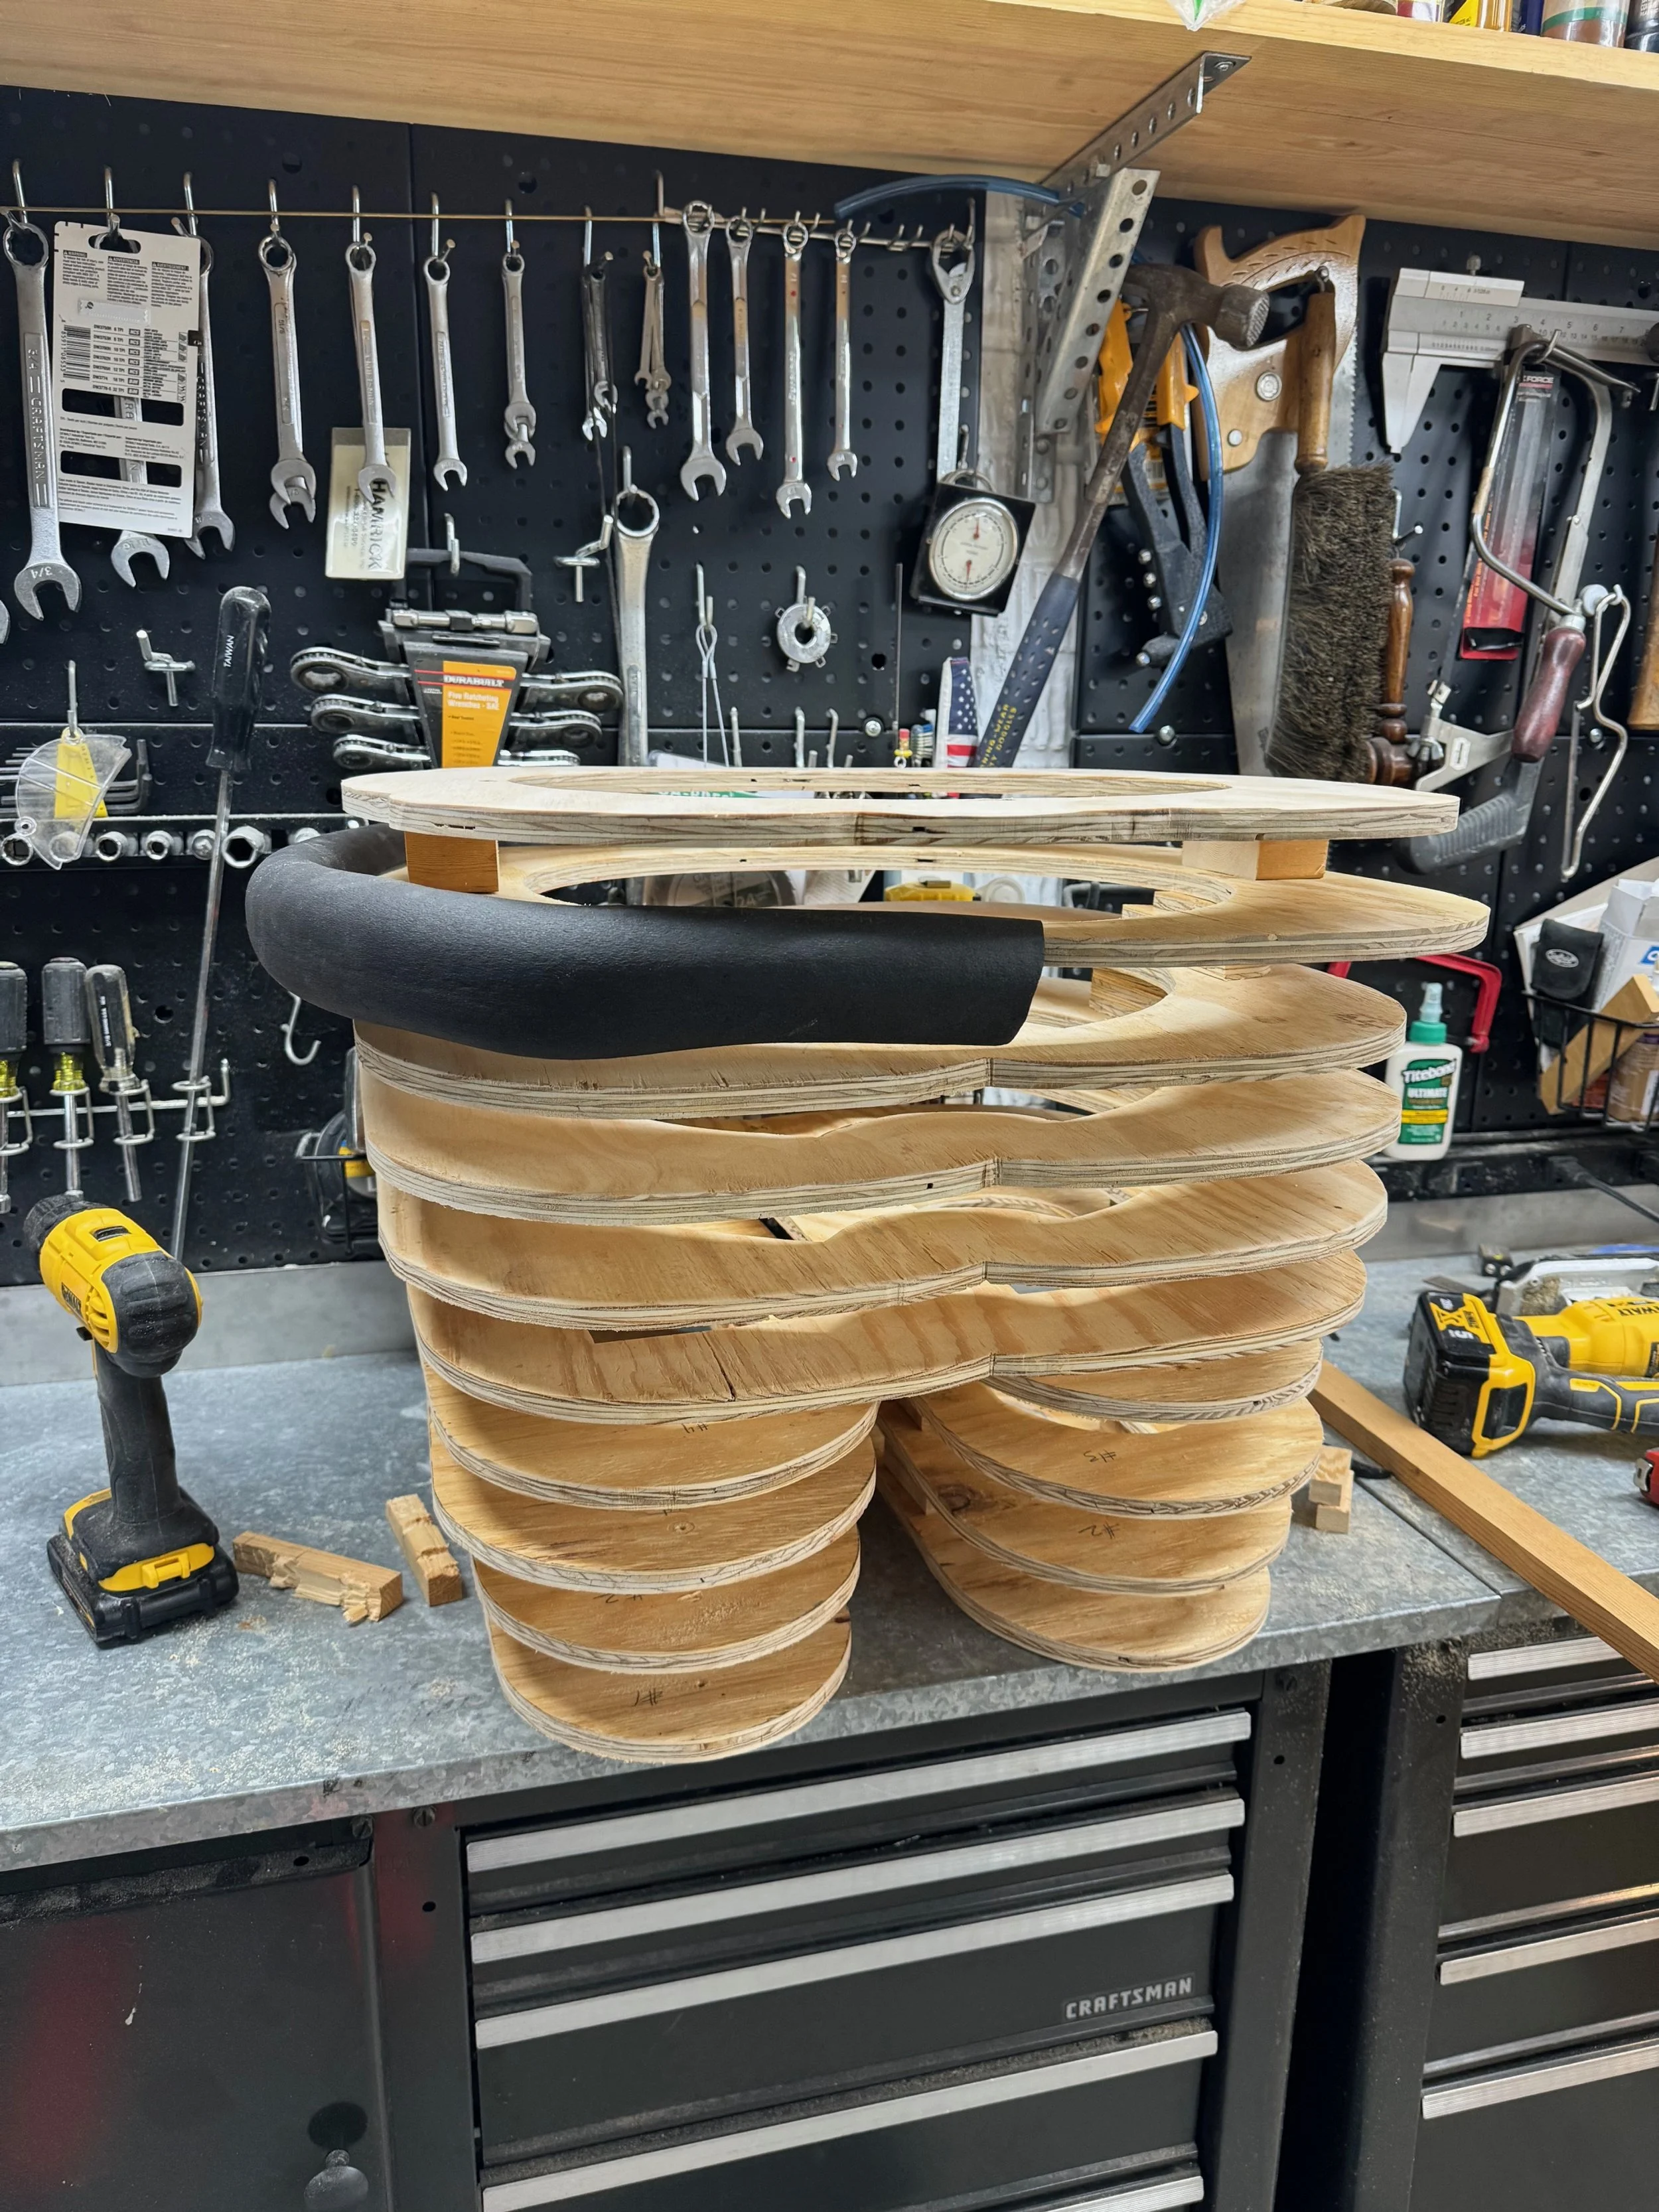
My first physical project was constructing the leg framework — the feet, ankles, and knees — following Mark’s outstanding drawings. That phase reawakened my love of woodworking and finally justified the router table I bought years ago but never used. Routing the curved foot panels and shaping the knee supports brought the build to life in a satisfying, hands-on way. Take a look at the woodworking gallery below — it’s amazing to see where it all began.


But it didn’t take long to realize that modern robot-building relies heavily on a new set of tools: 3D printers and CAD software.
At first, I had my friend Dave print a few parts for me — B9’s brain, radar posts, and a couple other small components that would’ve taken hours to cut from wood or plastic by hand. The precision and clean finish blew me away. That’s when I dove into the world of 3D printing and eventually landed on the Bambu Lab P1P — a fast, reliable, and shockingly easy-to-use printer that made printing B9 parts as addictive as it was rewarding.
Of course, there was a learning curve. I had to figure out slicer settings, filament types, and how to prep and finish prints for strength and appearance. I also had to pick up basic CAD skills — using tools like TinkerCAD, Fusion 360, or pre-made STL files shared by the B9 Builders Club and other fans online.
Some prints failed. Some warped. Some had support structures that took longer to clean up than they did to print. But little by little, the skills started stacking up — just like the growing pile of finished parts on my workbench.
This was the moment the build really started to accelerate. With woodworking, 3D printing, and CAD skills working in tandem, I could now fabricate just about anything B9 required — and custom-fit it to my own frame and electronics.
As I printed more parts, I began bolting them together and dry-fitting each section to check alignment, proportions, and clearances. There was something incredibly satisfying about seeing individual components — printed one by one — finally start to resemble something real. It was like assembling a giant 3D puzzle, except I was also the one manufacturing every piece.
Some parts slotted together perfectly. Others… not so much. That’s where I learned another new skill: solvent welding. Using Weld-On 3, a fast-acting acrylic solvent, I began fusing parts with clean seams and strong bonds. It took some practice — applying just enough without making a mess — but once I got the hang of it, it became an essential part of my build process. It was almost like plastic welding magic: two separate pieces would become one, permanently.


These early fit-ups were both thrilling and humbling. Sometimes, two pieces lined up flawlessly. Other times, I had to shave, sand, or reprint. But each trial brought more experience and more confidence. With every bolt tightened and every panel test-fitted, B9 was beginning to emerge from what had once been nothing but digital files and childhood dreams. (And no, I didn’t build it in my kitchen. This is in the basement in-law suite).
Torso, Brain, Bubble, and Chest Lights: Bringing B9 to Life — by Brian Ebie
This is the part of the build where the robot stops being a pile of parts and starts looking — and feeling — like B9.
One of the most iconic visual features of the B9 Robot is the array of “finger lights” just below his bubble. They blink, move up and down, and flash with personality, giving B9 his animated “head.” I 3D printed each of these finger light arms and assembled the motion system using the design shared by Mike J on the B9 Builders Club website — an elegant cam-and-pusher rod mechanism that animates the lights with a wonderfully lifelike rhythm.
It was the perfect match for my background in tracker action pipe organs, where mechanical linkages create expressive, coordinated motion. Watching that cam spin and the finger lights bounce in sequence felt like revisiting an old skill in an entirely new context.
The mechanism brings those upper lights to life just like in the original series — subtly twitching, swaying, and flickering as B9 “thinks.” It’s a small detail, but one that gives the whole upper torso a sense of personality and movement.
With the finger lights working, I moved on to assembling the torso shell and beginning work on the chest panel lights — that bank of LEDs that blink behind the grille as B9 speaks. Getting that iconic look right meant careful planning of the wiring layout and selecting the right components (more on that in the programming section later).
Each light, each flash, each subtle movement brings B9 a little closer to life — and for me, it brings the childhood memory of this robot into the present, one step at a time.
STL Files, Custom Mods, and the Global 3D Builder Community – With Help from Ian Hughes at SciFiProps — by Brian Ebie
As my B9 Robot project ramped up, I realized just how much of the build could be accomplished through 3D printing — not only with standard parts, but also highly detailed, screen-accurate components. That’s when I was directed by members of the B9 Builders Club to Ian Hughes’ Patreon page at SciFiProps.
Ian offers an impressive collection of high-resolution STL files based on the original B9 Robot. His work captures subtle surface details, curves, and mechanical features that would have been incredibly time-consuming to model from scratch. His files are clean, thoughtfully organized, and optimized for printing — perfect for builders like me who want quality results without reinventing the wheel.
Once I subscribed to his Patreon, I was able to download a complete STL package that included parts for the torso, arms, radar section, leg detail, and more. It was like opening a digital treasure chest. Even better, Ian was incredibly responsive when I reached out with a few custom requests. I had a couple of minor design tweaks in mind — things I wanted to change based on my available components or to better fit my hybrid approach — and Ian didn’t just say yes; he collaborated with me. He made adjustments, offered advice, and made the process of customizing the robot feel like a shared endeavor.

Some of the full-size 3D models available on Ian Hughes’ SciFi Props 3D — Brian Ebie
These parts became the first serious projects I printed on my Bambu Lab P1P. With its speed, reliability, and intuitive slicer software, the P1P made large, complex prints feel accessible. I learned how to dial in supports, optimize layer orientation for strength, and how to balance speed with surface finish. There were a few misprints (especially early on), but each mistake was a lesson — and part of the fun.
What struck me most during this stage of the build was just how global the 3D printing community really is. From Ian’s STL files and Patreon community — I found a network of builders willing to share experience, troubleshoot problems, and cheer each other on.
When I was a kid, building my first robot with sheet metal and the rotisserie motor, I had no idea that decades later I’d be trading 3D files with a designer in Australia. It’s amazing how far the hobby has come — and how accessible it’s become for anyone with curiosity, creativity, and a printer.
Arm Extension Mechanism (In & Out)
To replicate the iconic in-and-out motion of the B9 Robot’s arms, I engineered a dual-actuator system using two Progressive Automations PA-15-12-33 linear actuators. Each actuator delivers a 12-inch stroke and 33 pounds of force at 24VDC, providing ample power and range to extend and retract the arms smoothly from within the torso cavity.
test setup of Brian Ebie’s B9 Robot arm and claw mechanism hooked to the linear actuator.
Power is supplied by two 12V 20Ah TPE LiFePO₄ batteries wired in series to produce a reliable 24VDC output. This setup delivers high current capacity with stable voltage, ensuring consistent actuator performance. The entire system is routed through a fused terminal block for clean distribution and safety.
Each actuator is controlled by its own Cytron MD25HV motor driver, selected for its ability to handle 24V high-load applications with built-in protection and straightforward integration. These drivers receive control signals from an Arduino Mega, which manages timing and logic for actuator movement.

Instead of manual control, the arms operate via a simple program that generates randomized movement patterns. When one of the chest pushbuttons is pressed, the Arduino triggers a sequence where the arms extend and retract in a natural, unpredictable rhythm. This gives the robot a more lifelike and autonomous appearance, enhancing its interactive presence.
Mechanically, the actuators are mounted on a robust internal frame made from 2020 and 2080 V-slot aluminum extrusions. The arms glide in and out on heavy-duty drawer slides, which provide smooth, aligned linear motion while supporting the weight and minimizing wobble. Custom 3D-printed brackets secure the actuators and allow for easy maintenance or adjustment.
These actuators were acquired through eBay as unused surplus. Although they were new and in original packaging, they had been stored on a shelf for many years. When first powered up, both actuators produced a high-pitched howling noise during initial movement. After some investigation, I discovered that the internal lubrication had broken down over time, causing excessive friction during the early cycles.
Fortunately, I found a helpful teardown document online that guided me through disassembling the actuator bodies. I was able to open the units, clean out the old grease, and apply fresh lubrication to the worm gear and internal drive mechanism. After reassembly, the actuators ran much more quietly and smoothly—restoring them to full performance.
This system was developed including best practices for high-voltage wiring, actuator synchronization, and Arduino-based logic control. The result is a dependable, self-operating mechanism that brings the B9’s signature arm motion to life with clean engineering.


B9 Robot Build Resources – Brian Ebie’s Recommended Tools, Parts & Links
A curated list of tools, parts, blueprints, and community links used by Brian Ebie during the construction of his full-size B9 Robot from Lost in Space.
B9 Robot Build Resources – Brian Ebie’s Recommended Tools, Parts & Links
A curated list of tools, parts, blueprints, and community links used by Brian Ebie during the construction of his full-size B9 Robot from Lost in Space.
UNDER CONSTRUCTION
Community & Reference Hubs
B9 Robot Builders Club – The main source for blueprints, forums, galleries, and expert advice on all things B9. Ideal for builders at any stage.
https://www.b9robotbuildersclub.com/B9 Robot Builders Club Scrapbook – A detailed visual build diary by another club member, showing step-by-step progress and shop practices.
https://www.b9robotbuildersclub.com/pub/builders/scrapbooks/sb_B90002_1.html
Photo Archives & Build Diaries
Bob Greiner’s B9 Robot Project
An extensive visual build diary hosted on Tripod, showcasing step-by-step construction—mechanical assemblies, wiring details, radar dish, collar mechanisms, torso vents, knee hinges, and more. A fantastic source for motorizing and assembling full‑scale B9 components.
https://bobgreiner.tripod.com/Marty’s B9 “The Robot” Build
A comprehensive Tripod-based documentation of Marty’s full-scale B9 build. Features detailed photos and notes on servo setups, torso construction, dome assembly, and light sequencing. A great complement to Bob’s diaries, helping round out your visual and technical reference library.
https://martl.tripod.com/TheRobot/index.htmlBuilder’s Diaries on SmugMug
A detailed collection of photos from an 11 %‑scale B9 build—excellent for close-up views of fittings, finishes, and build stages. A strong resource for dimension reference and modeling inspiration.
https://b9bobj.smugmug.com/11-Scale-B9-Robot-Build
Feature 3
Donec eget risus diam. Nullam sit amet nisi condimentum erat iaculis auctor.